Enabling SSL in SQL Server 2012
Published: 10/29/2012 9:32:02 PM
In the last post I went through the steps to create a certificate and installing it in IIS. Installing a certificate in IIS opens up the possibility to use SSL between the client and the web server, which is useful if you intend to transfer sensitive information such as passwords. This time I thought I would take it one step further and enable SSL at the database layer. This means that the traffic between the web server and the database will be protected as well, in case they are located on different servers.
The first thing I did was to install SQL Server Express 2012 with default settings on a test server running Windows Server 2008. After the installation was complete I started SQL Server Management Studio (SSMS) and connected to my instance to verify that it worked.
Having verified that the database seemed to work, I turned to the certificate. It is assumed that the certificate already exists and is installed in the computer store on the local machine. Please note that the certificate must meet certain conditions before SQL Server will load it, see Encrypting Connections to SQL Server for more information regarding that. The perhaps trickiest one is that the Common Name (CN) of the Subject must match either the host name or the fully qualified domain name.
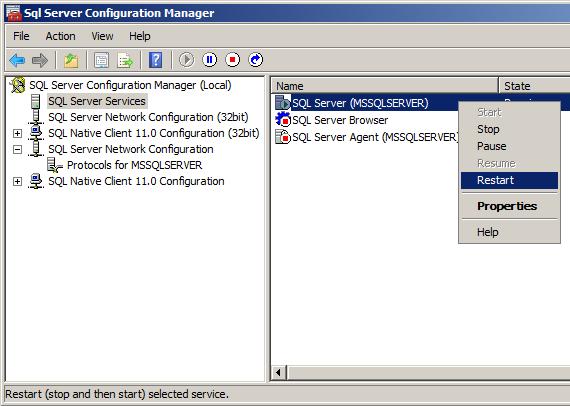
So now its time to configure SQL Server to use the certificate. Open up SQL Server Configuration Manager (SSCM) and expand the "SQL Server Network Configuration" node. Right-click on the sub-node that corresponds to the instance you wish to enable SSL on and select "Properties".

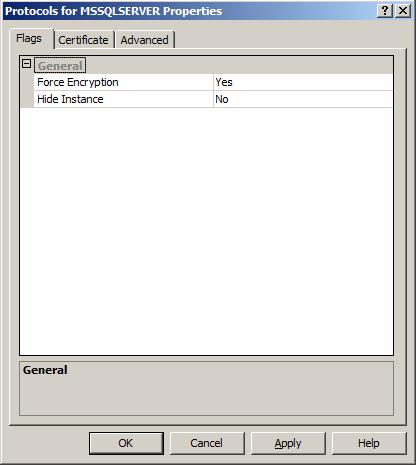
The properties page have three tabs: "Flags", "Certificate" and "Advanced". On the "Flags" tab, set the "Force Encryption" to either Yes or No depending on whether you want to force encryption between the client and the server. Note that No does not disable encryption, it just makes it optional in case the client would request it.
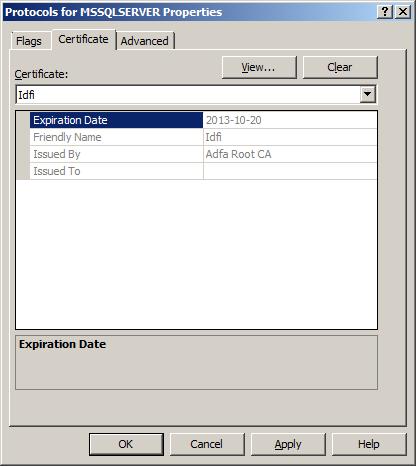
On the next tab, "Certificate", you will see a dropdown list of all available certificates. If you don't find your certificate in the list, please make that your certificate meets the requirements mentioned above. Otherwise, simply select the certificate you wish to use. Press "OK" to close the properties dialog.
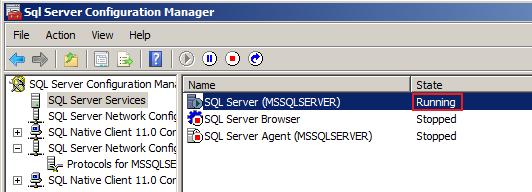
After these settings have been changed, the SQL Server service needs to be restarted. In the SSCM, select the "SQL Server Service" node, right-click on the service that represents the instance you just configured and select "Restart".
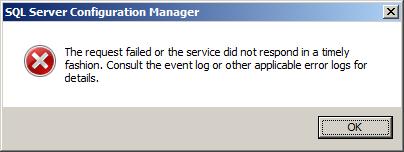
If you are lucky your service will restart without errors and your SQL Server instance should now support SSL. However, if you are unlucky like me you may get an error stating that the service could not start.
Looking in the Event Log you might find an error with the following text (the thumbprint has been removed):
Unable to load user-specified certificate [Cert Hash(sha1) "< thumbprint removed >"].
The server will not accept a connection. You should verify that the certificate is correctly
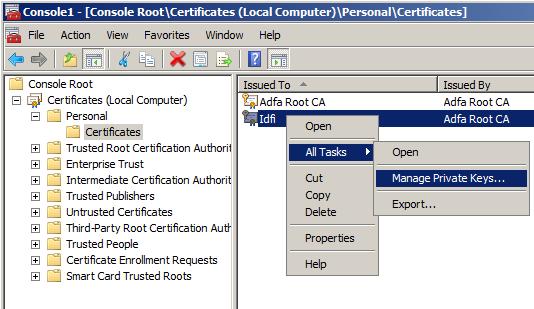
installed. See "Configuring Certificate for Use by SSL" in Books Online.One common cause for this error is that the user identity under which the SQL Server services runs lack permissions to read the private key of the certificate. To fix this you need to start MMC and add the "Certificates" snap-in for the local machine. Once you have done this you need to find the certificate under the Personal store, right-click and select "All Tasks" > "Manage Private Keys...".
Make sure that the user identity you are using to run the SQL Server service have read permissions to the keys. In my case I was running the service under the Network Service identity, and after adding permissions for that user the dialog looked like this:
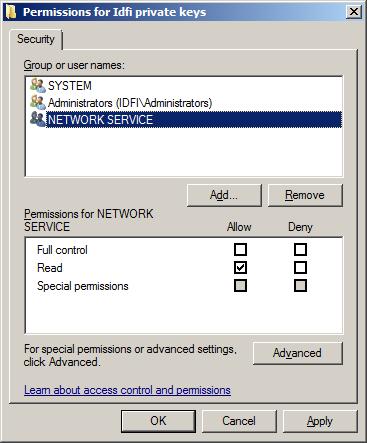
Apply the permissions and return to the SSCM and attempt to start the service again. The services should now start without errors, and you should be able to encrypt the communication to the database using your certificate.